
商品画像をマウスオーバーで4分割にスライスして隠れたキャプションを表示

キレイに並べた商品画像でマウスオーバーした際に見せ方は色々ありますが、このブログでも今までも何度かマウスオーバー時に・・・というのを紹介してきました。
過去記事 参考
マウスオーバー | ネットショップ運営の気になる備忘録

本日は、jQueryとjQuery Easing Plugin(エフェクト動作パターン)を使った画像を4分割にスライスする方法を紹介します。
画像のマウスオーバー時に4分割にスライスして隠れたキャプションを表示する見せ方jQuery、jQuery easing

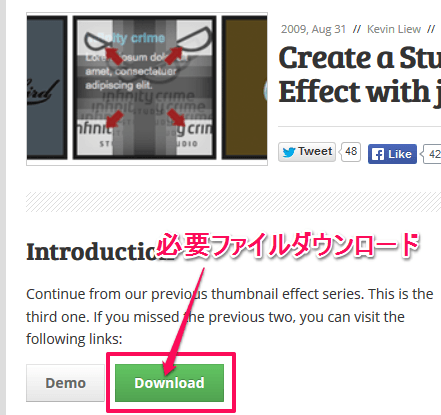
Create a Stunning Sliding Door Effect with jQuery
上記サイトより必要ファイルのダウンロード、デモの動作確認が可能です。
ダウンロードしたファイルから「slicing」フォルダの中身を使えばすぐに実装が可能です。
index.htmlを編集していきます。ファイル名を変えても良いかもしれません。
「slicing」フォルダ内で使うファイル、フォルダ
・jsフォルダ・・・jquery関連のファイル
・bg.gif・・・キャプションエリアの背景画像
・index.html ・・・このファイルを編集していきます(名前を変えてもOK)
また、1.gif、2.gif・・・・9.gif の画像ファイルはサンプル画像なので削除してもかまいません。
ソースを紹介していきますが、長くなるので3つに分けていますが、本来は1つのファイルです。
index.html
js読み込み、CSS記述部分 headエリア
<script src="jquery-1.3.1.min.js" type="text/javascript"></script>
<script type="text/javascript" src="js/jquery.easing.1.3.js"></script>

<style>
body {
  font-family:arial;
}

.qitem {
  width:180px;
  height:119px;
  border:4px solid #222;
  margin:5px 5px 5px 0;
  background: url('bg.gif') no-repeat;

  /* required to hide the image after resized */
  overflow:hidden;

  /* for child absolute position */
  position:relative;

  /* display div in line */
  float:left;
  cursor:hand; cursor:pointer;
}

.qitem img {
  border:0;
  /* allow javascript moves the img position*/
  position:absolute;
  z-index:200;
}

.qitem .caption {
  position:absolute;
  z-index:0;
  color:#ccc;
  display:block;
}

.qitem .caption h4 {
  font-size:12px;
  padding:10px 5px 0 8px;
  margin:0;
  color:#369ead;
}

.qitem .caption p {
  font-size:10px;
  padding:3px 5px 0 8px;
  margin:0;
}

/* Setting for corners */
.topLeft, .topRight, .bottomLeft, .bottomRight {
  position:absolute;
  background-repeat: no-repeat;
  float:left;
}

.topLeft {
  background-position: top left;
}

.topRight {
  background-position: top right;
}

.bottomLeft {
  background-position: bottom left;
}

.bottomRight {
  background-position: bottom right;
}

.clear {
  clear:both;
}
</style>
まずは10、11行目のwidthとheight部分は表示する画像のサイズに合わせて調整します。ここで注意が必要なのは画像の元サイズと合わせる必要があることです。スクリプトで4分割にスライスする際に画像サイズを元に4分割する処理になっているようなので、画像サイズは表示したいサイズにサイズ変更しておく必要があります。
200×200の画像を100×100で表示するという使い方ではなく、まずは200の画像を100にサイズ変更しておく必要があります。
このサンプルソースでは width:180px、height:119pxとしています。
14行目の背景画像を指定している部分ですが、元々のbg.gifではサイズが異なるので、別の画像を用意するか、サイズ変更する必要があります。もしくは、背景画像をやめるのも1つです。
34行目から52行目にある.qitem .captionが続きますが、マウスオーバーして画像を4方向にスライスされた際に表示されるエリアに関する記述です。文字サイズ、色等ここで調整してください。
取り急ぎ実装するのに調整が必要な箇所は以上です。
次にスクリプト部分を見ていきます。
Script部分
<script type="text/javascript">
$(document).ready(function() {
	//Custom settings
	var style_in = 'easeOutBounce';
	var style_out = 'jswing';
	var speed_in = 1000;
	var speed_out = 300;

	//Calculation for corners
	var neg = Math.round($('.qitem').width() / 2) * (-1);
	var pos = neg * (-1);
	var out = pos * 2;

	$('.qitem').each(function () {
		url = $(this).find('a').attr('href');
		img = $(this).find('img').attr('src');
		alt = $(this).find('img').attr('img');

		$('img', this).remove();
		$(this).append('<div class="topLeft"></div><div class="topRight"></div><div class="bottomLeft"></div><div class="bottomRight"></div>');
		$(this).children('div').css('background-image','url('+ img + ')');

		$(this).find('div.topLeft').css({top:0, left:0, width:pos , height:pos});
		$(this).find('div.topRight').css({top:0, left:pos, width:pos , height:pos});
		$(this).find('div.bottomLeft').css({bottom:0, left:0, width:pos , height:pos});
		$(this).find('div.bottomRight').css({bottom:0, left:pos, width:pos , height:pos});

	}).hover(function () {

		$(this).find('div.topLeft').stop(false, true).animate({top:neg, left:neg}, {duration:speed_out, easing:style_out});
		$(this).find('div.topRight').stop(false, true).animate({top:neg, left:out}, {duration:speed_out, easing:style_out});
		$(this).find('div.bottomLeft').stop(false, true).animate({bottom:neg, left:neg}, {duration:speed_out, easing:style_out});
		$(this).find('div.bottomRight').stop(false, true).animate({bottom:neg, left:out}, {duration:speed_out, easing:style_out});

	},

	function () {

		$(this).find('div.topLeft').stop(false, true).animate({top:0, left:0}, {duration:speed_in, easing:style_in});
		$(this).find('div.topRight').stop(false, true).animate({top:0, left:pos}, {duration:speed_in, easing:style_in});
		$(this).find('div.bottomLeft').stop(false, true).animate({bottom:0, left:0}, {duration:speed_in, easing:style_in});
		$(this).find('div.bottomRight').stop(false, true).animate({bottom:0, left:pos}, {duration:speed_in, easing:style_in});

	}).click (function () {
		window.location = $(this).find('a').attr('href');
	});


});
</script>
スクリプトに関しては特に変更する必要はありませんが、5行目から8行目でアニメーション(easing)設定、速度など指定することが可能です。
style_inやstyle_outに指定出来る内容としては下記を参考にしてみてください。
jQuery Easing Plugin | エフェクト動作パターン集プラグイン
htmlタグ部分
<div class="qitem">
	<a href="#"><img src="sample195-1.jpg"  width="180" height="119"/></a>
	<span class="caption"><h4>マウスオーバー時</h4><p>画像を4分割にするエフェクト</p></span>
</div>

<div class="qitem">
	<a href="#"><img src="sample195-2.jpg" width="180" height="119"/></a>
	<span class="caption"><h4>ここに表示する内容は</h4><p>caption内にテキストなどを記述する</p></span>
</div>

<div class="qitem">
	<a href="#"><img src="sample195-3.jpg" width="180" height="119"/></a>
	<span class="caption"><h4>タイトル</h4><p>画像サイズとCSS上のサイズは揃えておく必要がある</p></span>
</div>

<div class="clear"></div>

<div class="qitem">
	<a href="#"><img src="sample195-4.jpg" width="180" height="119"/></a>
	<span class="caption"><h4>使い方は</h4><p>キャッチコピー、商品名、価格など表示しても良いかも</p></span>
</div>

<div class="qitem">
	<a href="#"><img src="sample195-5.jpg" width="180" height="119"/></a>
	<span class="caption"><h4>タイトル</h4><p>説明分</p></span>
</div>

<div class="qitem">
	<a href="#"><img src="sample195-6.jpg" width="180" height="119"/></a>
	<span class="caption"><h4>タイトル</h4><p>説明文</p></span>
</div>

<div class="clear"></div>
ダウンロードしたソースでは9つの画像を表示していましたが、記述が長くなるので6つに削った状態です。
<div class=”qitem”></div>が1つの画像、隠れているキャプションを設定しています。そのブロックが6つある状態ですね。
<div class=”qitem”></div>の内側についてはリンク、画像を記述してあるのと<span class=”caption”></span>が後ろに隠れているキャプションを指定しています。
また、3つごとに折り返しするのに
<div class=”clear”></div>
があります。幅に応じて自動的に折り返しもされるので無くても良いかもしれません。
表示したい個数を折り返す位置を変更したい場合は上記の2つにて調整します。
動作サンプル
いかがでしょうか。商品画像にマウスオーバーした際に後ろに隠れたキャプションで商品説明、価格など表示するのも良いかもしれません。ぜひ、活用してみてください。


Your Message